Add & Edit Entries
Entries hold your saved credentials. This guide covers adding a new entry, filling in its fields, organizing it, and editing an existing one — all of which are free.
Add a New Entry or Group
The + control in the dashboard toolbar — and inside any group — opens a short menu. Choose New Entry to create a credential, or New Group to create a folder for organizing entries. Creating entries and groups is free.
Start From a Template (Optional)
When you create an entry you can start from a built-in template to pre-fill the fields for a common account type, or begin with a blank entry. See Templates for details.
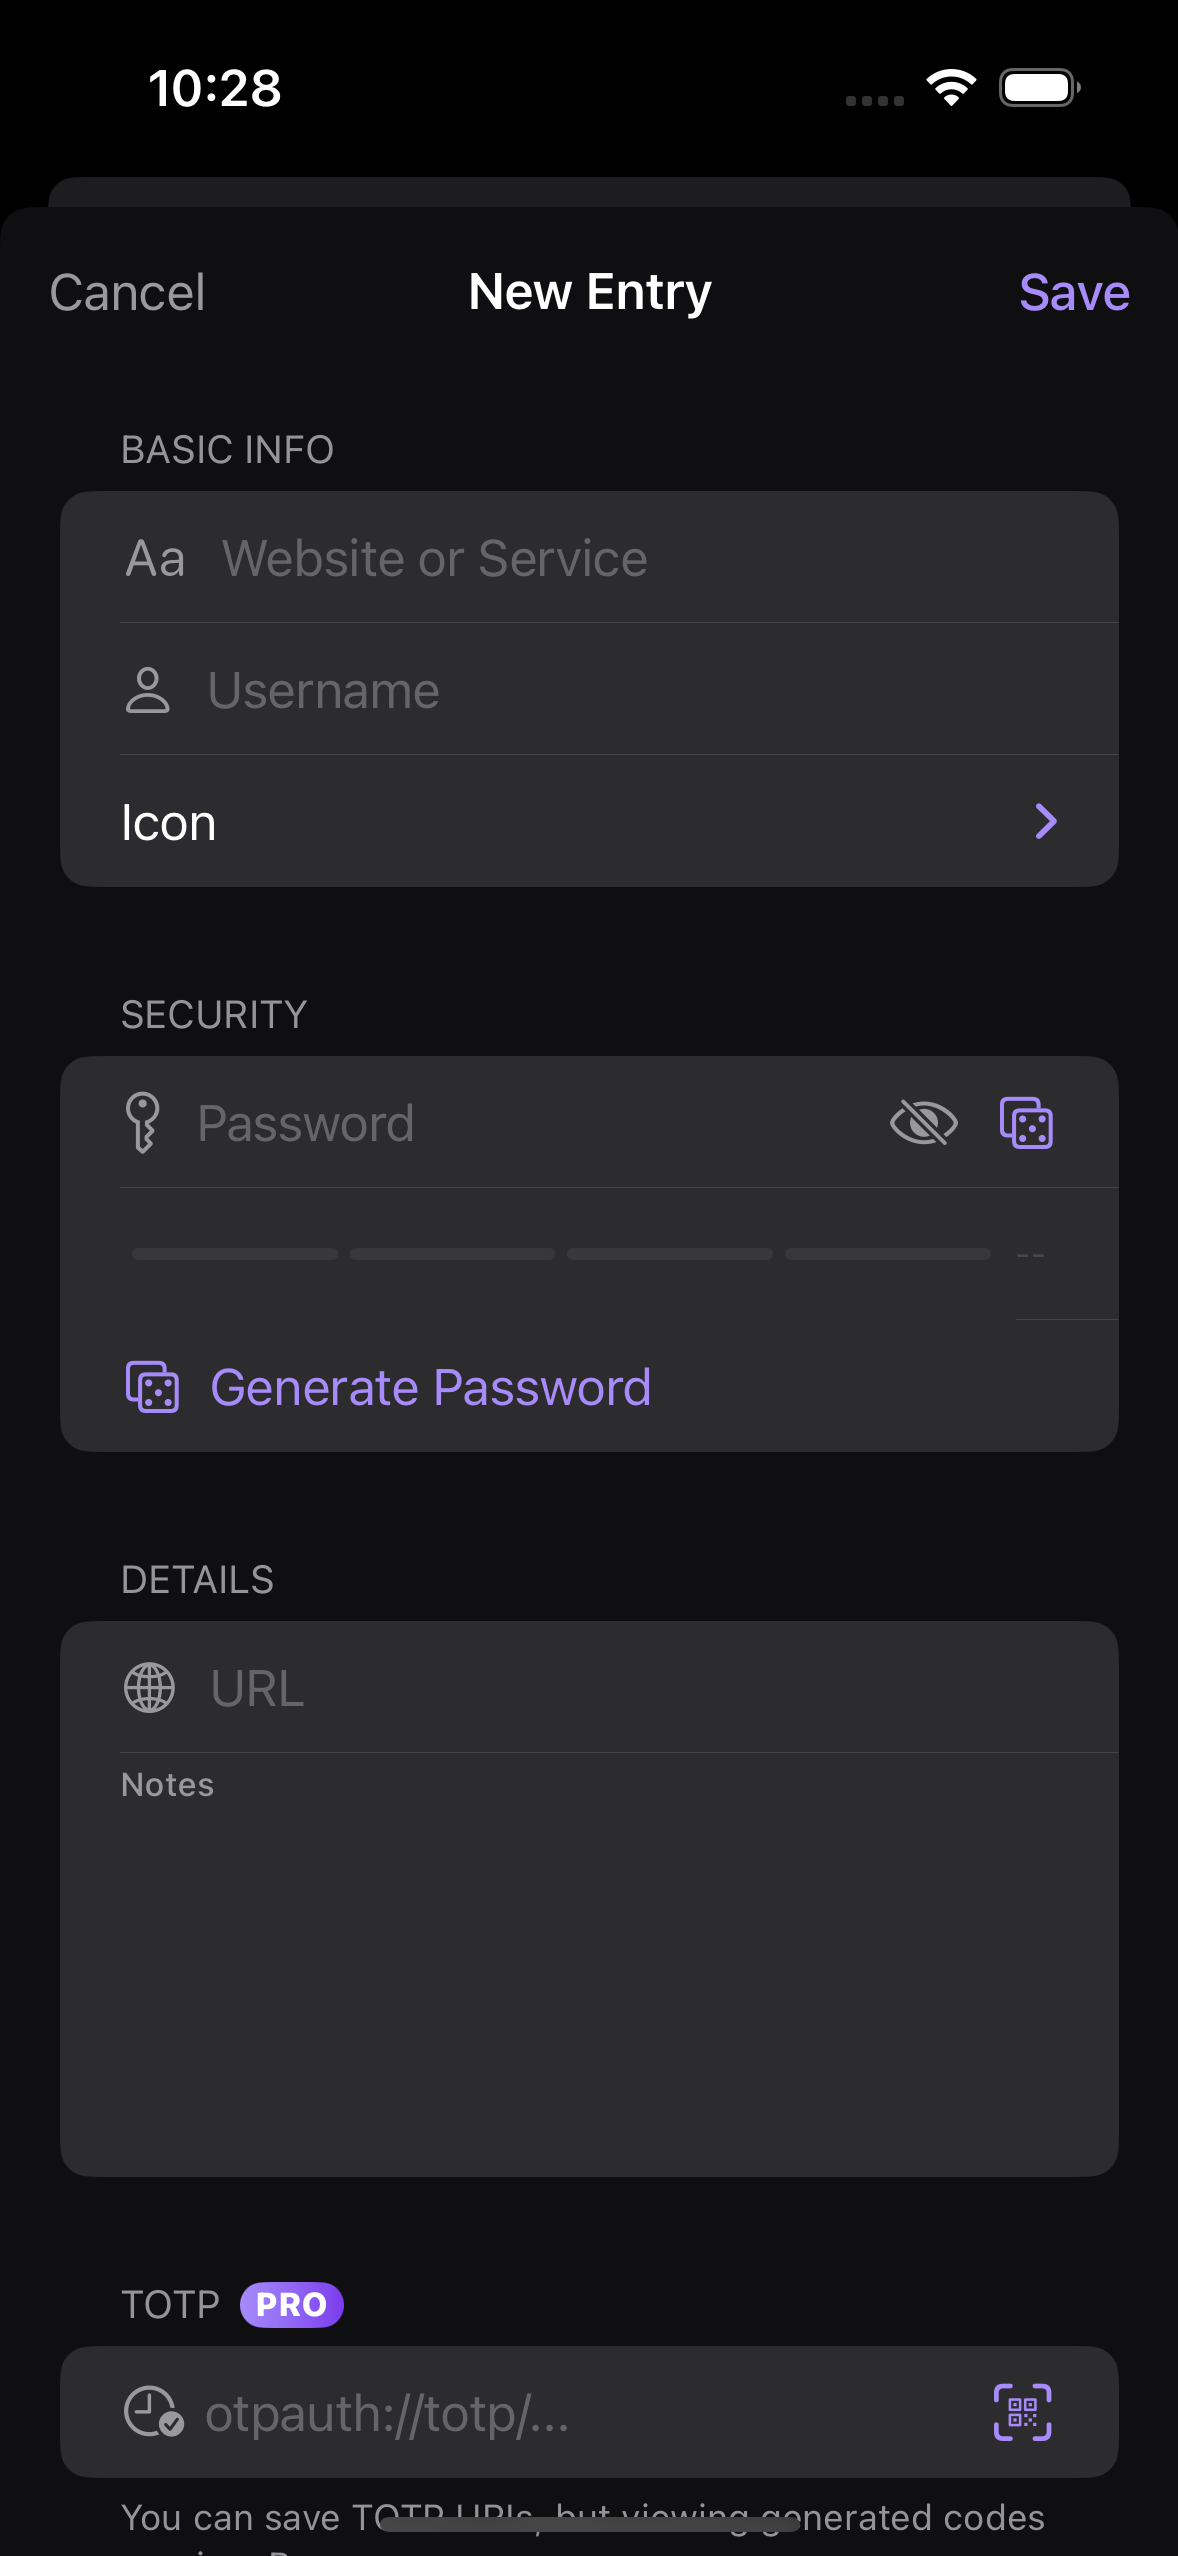
Fill In the Fields
An entry has the standard fields Title, Username, Password, URL, and Notes. You can also pick an icon from the 69 standard KeePass icons, assign Tags, and store a TOTP secret. Use the generator button beside the password field to create a strong password.
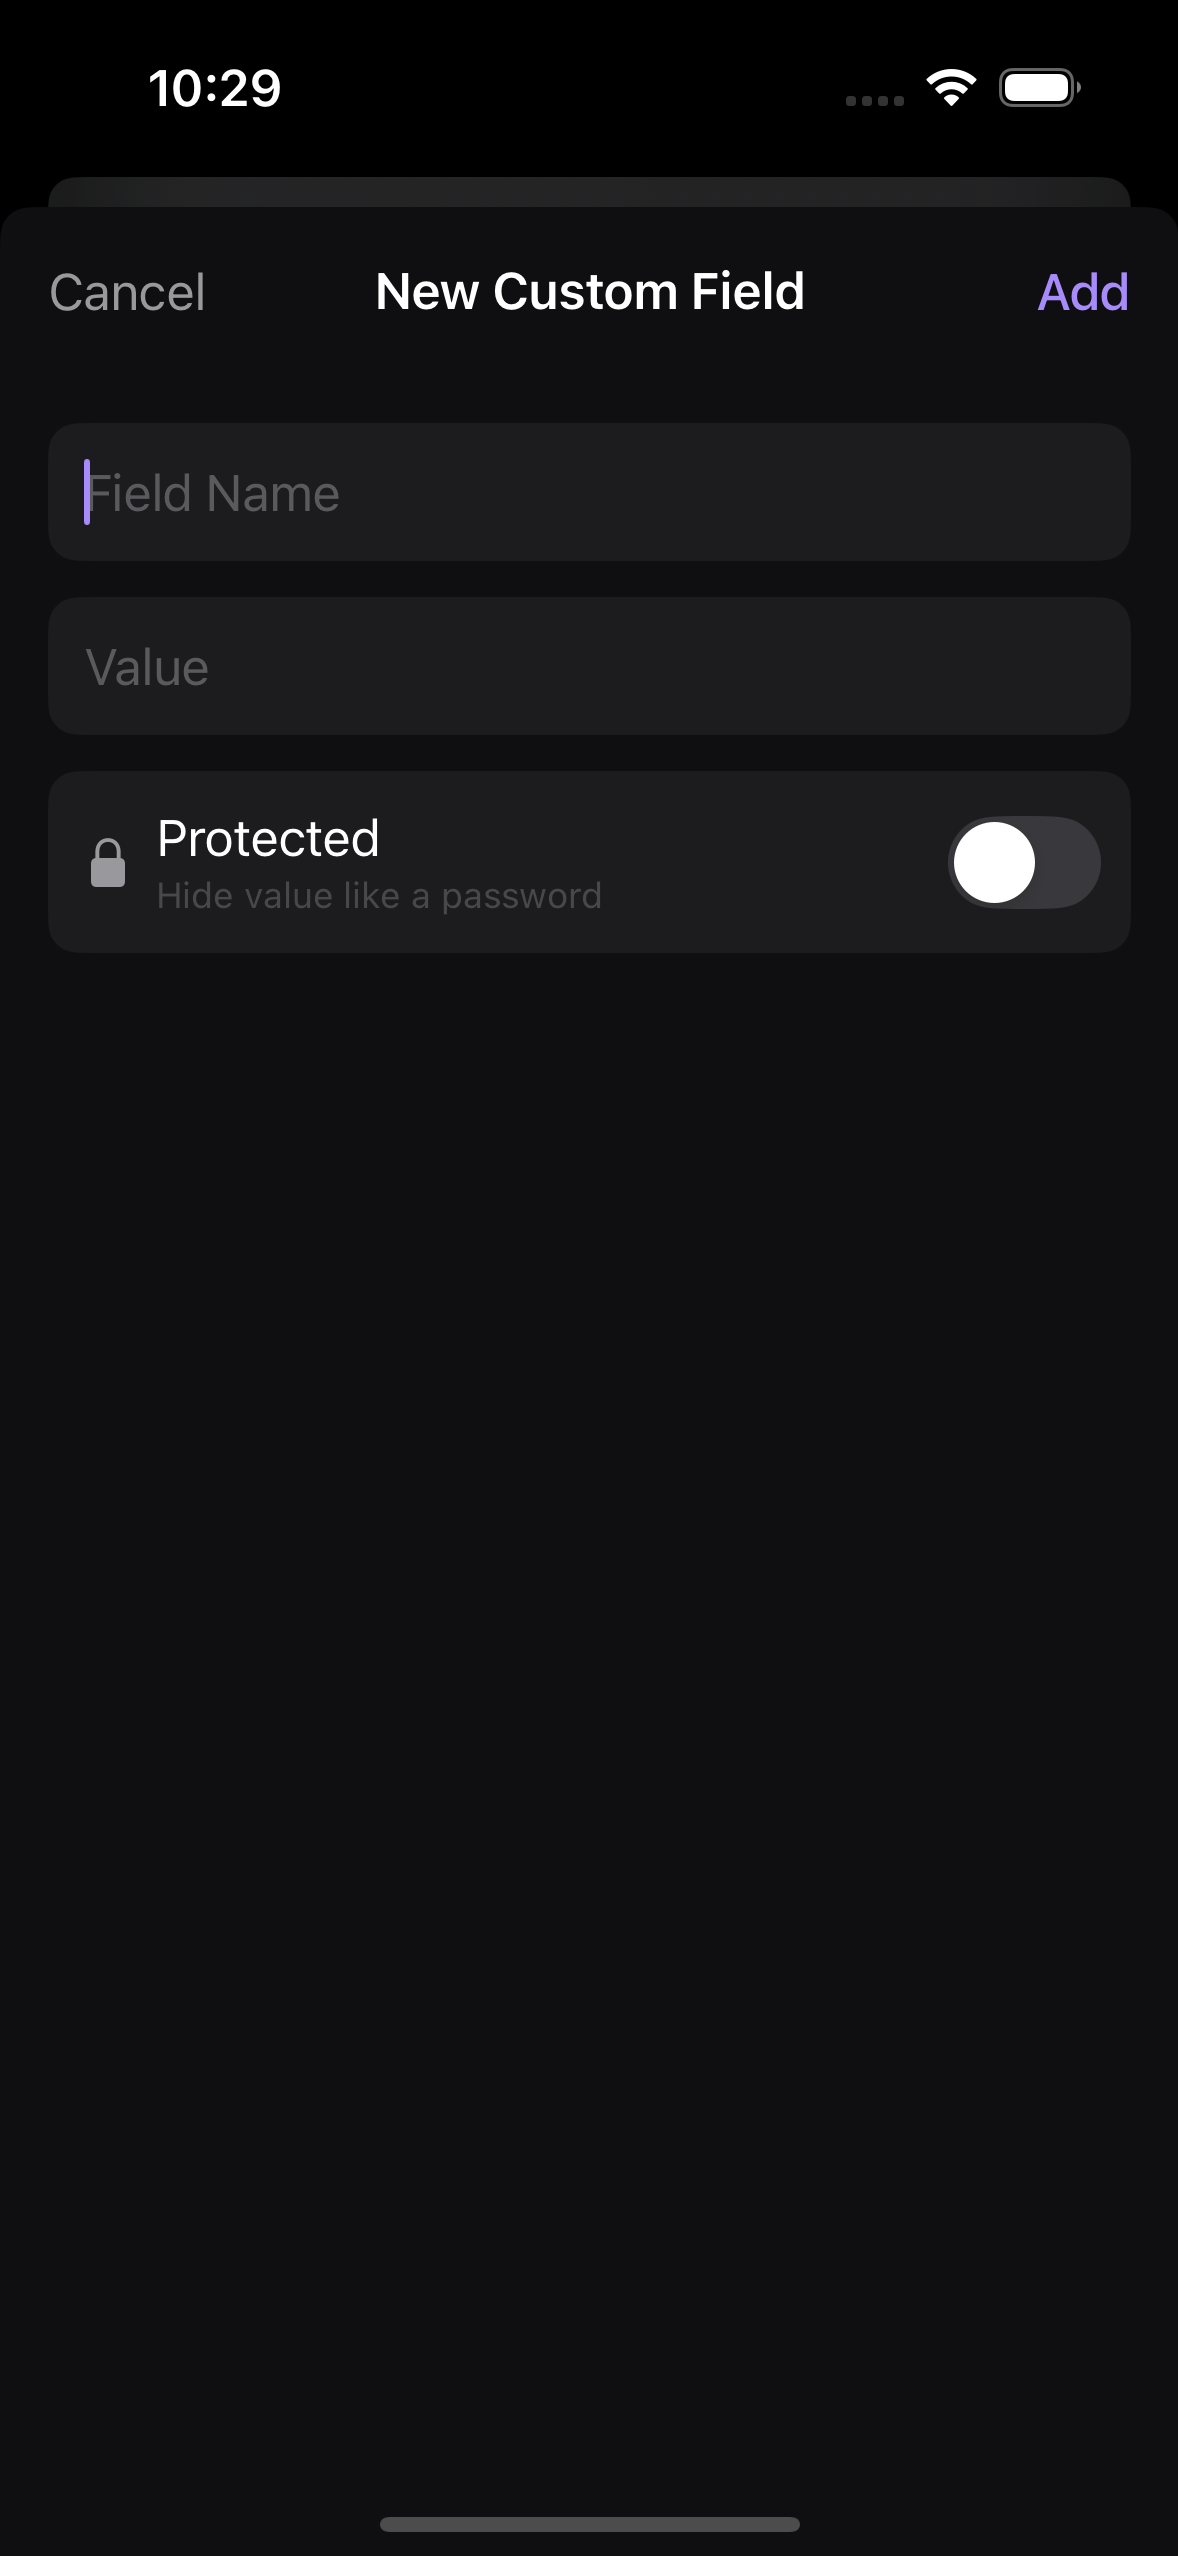
Add Custom Fields
To store anything beyond the standard fields, tap Add Custom Field in the editor and enter a key and value. Mark a value as protected to keep it hidden until you choose to reveal it. Custom fields are free.
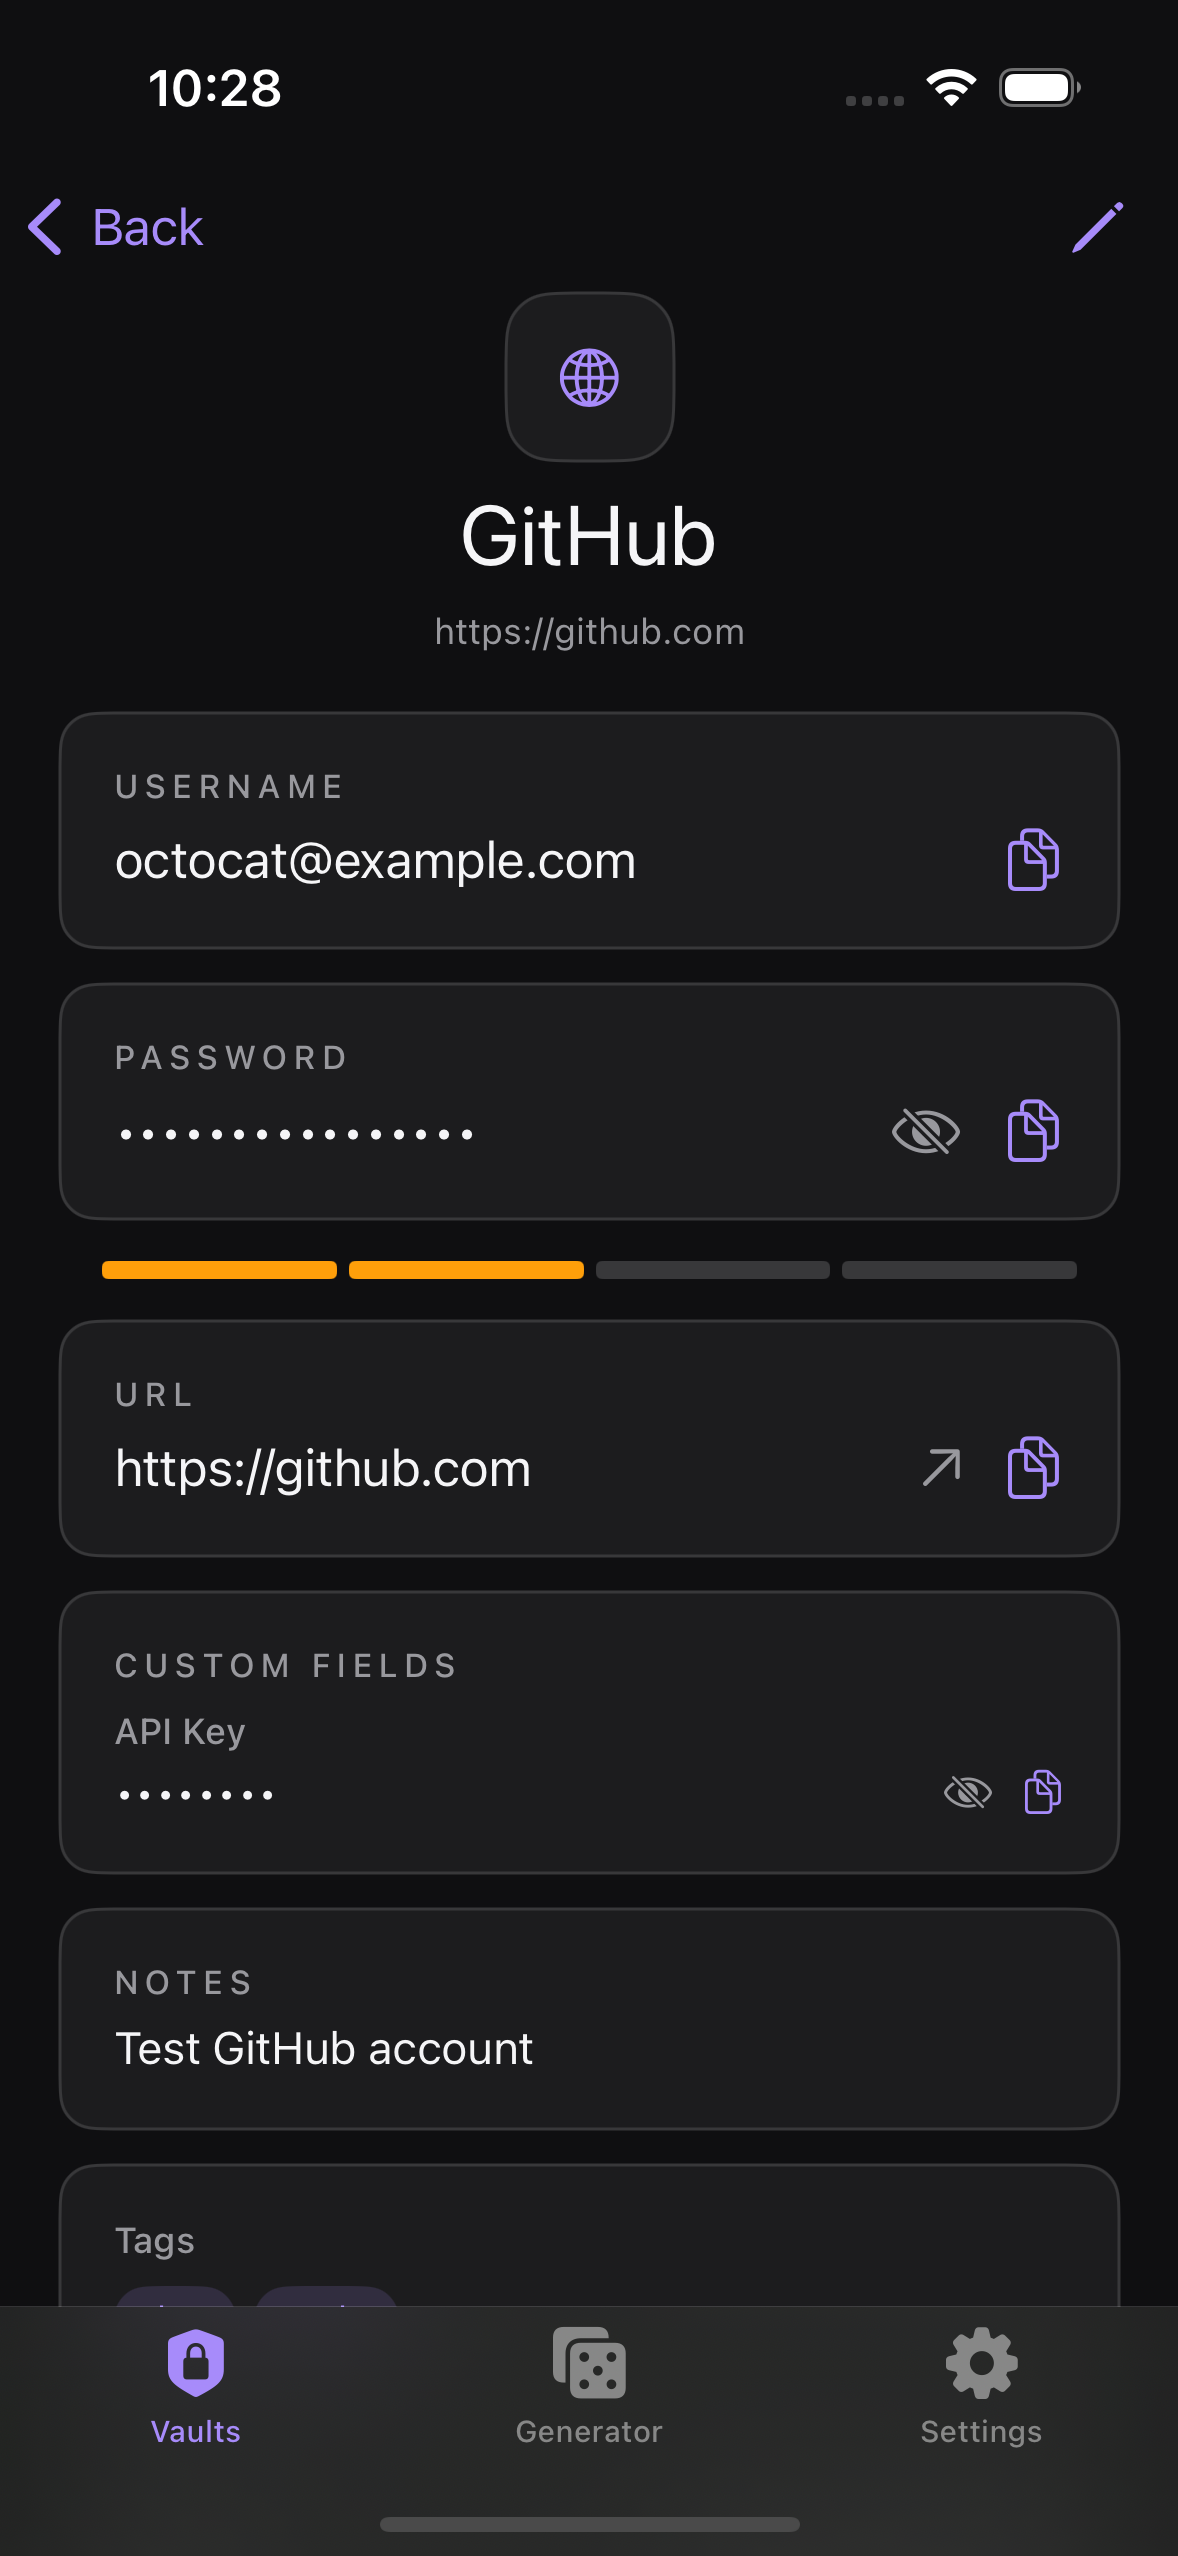
Save and Review
Tap Save to commit the entry. The detail screen shows the saved fields, and you can copy a value with a tap. To reorganize later, use Move to Group to move an entry into a different group.
Edit an Existing Entry and Its History
Open an entry and edit any field, then tap Save. When you edit an existing entry, Kakuremi automatically snapshots the previous version, so you can view earlier versions and Restore one if needed. New entries start with no history.